Wednesday, January 16, 2013

The freshest sources for hops

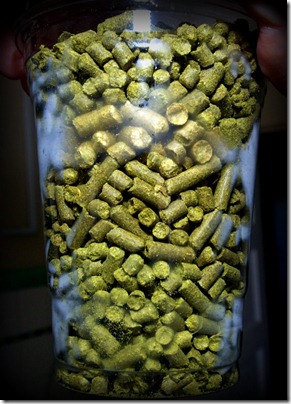
1-BrewPictures  083What I find interesting is that I rarely see the farm, brand or supplier of hops mentioned when discussing sources for hops. Typically, varietals are mentioned as a commodity. Someone will post, "[company name] has this year’s Cascade for $11/lb," as if Cascade from one source is the same as any other source, with the only difference being price. I never used to give this much thought, until this last year...

Last year I purchased Citra hops from two different suppliers (both the current harvest year), and there was a huge difference between the aroma of the hops. It wasn't even close. You could take one whiff from the first bag, and then a whiff of the other, and it was night and day. One had a big citrus/tropical aroma; the other, not so much when compared to the first. Had I not had the two there to compare, I might have thought the one with less aroma was fine. After all, it still smelled like hops. It's just that it was so much more muted than the other source that I dumped out the hops that had less aroma. Why use inferior hops in something that you’re going to spend a considerable amount of time, energy and money into making?

Shopping for hops is like shopping for produce. You can shop based on price per pound, or you can shop based on quality (however you define quality is up to you). Farmers that properly grow good crops in rich soil, wait to pick them until they’re ripe, and then deliver the fresh produce to local shops for immediate purchase, simply cannot compete on price with the mega farming corporations out there that are cutting costs at every step of the process. For example, I can buy oranges at the local grocery store that are decent (taste like what my mom bought, likely at the same kind of grocery store), or I can get oranges from a local farmers market or CSA that are the juiciest, most flavorful oranges I've ever had. It's like [excuse the pun] apples and oranges. This same analogy applies to hops.

HopUnion 1 oz and 1 lb bags
Of course, you can overpay for crappy, poorly treated hops as well (my LHBS, for one). Price isn't what makes one hop supplier better than another. I'm not familiar with every hop supplier out there, but I've ordered from several online sources and found HopUnion’s nitrogen flushed hops to be quite fresh and fragrant. I typically buy 1 lb bags from LabelPeelers because of the cost savings. This year my pound of Amarillo from LabelPeelers came in (16) 1 oz packages. I like the idea of the 1 oz HopUnion bags for the sake of freshness. Keeping the hops in a sealed, nitrogen flushed environment is better than opening the same bag several times throughout the year (even if you reseal it with a vacuum sealer).

Hops Direct 1 lb bag (partial)
HopsDirect seems to have fresh hops, too, but I find their 1 lb vacuum sealed foil bags a little difficult to work with. They often come hard as bricks, with the pellets being stuck together. Farmhouse Brewing Supply offers a wide variety of hops in convenient 4 oz packages, and the prices are good. I’m not a big fan of the packaging, but most of the packages remain sealed. I haven’t compared the hops that I’ve bought from Farmhouse Brewing Supply with other suppliers/retailers.

Farmhouse Brewing Supply 4 oz bags
I'd like to try hops from IndieHops. I like what they stand for and I hear good things about them, but the minimum order of 11 lbs per hop is prohibitive for a homebrewer, and they only supply a limited number of hop varietals. IndieHops seems to cater more to small craft brewers than to homebrewers, and sell first to contracted accounts. This might be a good company to do a group buy with.

Other than the big online homebrew shops, some other hop suppliers that I’ve seen people ordering from are Yakima Valley Hops (they package their own hops at reasonable prices), Nikobrew (not the best pricing, but cheap shipping), and some discount eBay sellers. I have no experience buying from these companies.

I'd be interested in hearing others' thoughts on this subject in the comments. Has anyone else found a difference between hop suppliers? Are there other good sources for quality hops at reasonable prices?

Tuesday, January 1, 2013

Low pressure burner testing

BrewPictures  008
The first question I had when designing my brewing system was what type of energy to use. My first choice was steam, but that was a pipe dream (pun intended). Next was electric for a variety of reasons, but that option required me to upgrade my electric panel, which was cost prohibitive. That left me with either propane or natural gas as options. I decided on natural gas because it is more economical, the idea of refilling tanks regularly was not appealing, and I could easily see myself running out of gas in the middle of a brew session.
An initial test run on the system produced poor results. After nearly 2 hours of heating, it hadn’t reached a boil. Some testing was needed to increase the performance of the burners (a link to the spreadsheet data is at the bottom of the page).
The areas to be tested were:
  1. burner height – the distance from the burner to the kettle
  2. heat transfer – using a more conductive metal to transfer thermal energy from the flame to the kettle
  3. ventilation – insufficient ventilation chokes the flame
  4. gas pressure – the burners were designed to work optimally at 11” WC of pressure, while most utility companies deliver gas to residential buildings at 7-9” WC.
For all tests, 10 gallons of 75°F water was heated on a single 10” low pressure burner, and temperature readings were taken every 5 minutes.
1-DSC_0005burner height
The first tests (test #1 in the chart below) involved adjusting the burner mount height. The heat shield/burner mount has a split open back to allow for rear ventilation above the burner, and comes with 3 sets of holes for adjusting the distance between the burner and the bottom of the kettle. The distance from the bottom hole to the top hole is approximately 1”, and while there was a slight difference in performance between the top mounting hole and the bottom, the results were not significant (which is why only one of the tests is charted). After 50 minutes, the best configuration was at 170.7°F.
heat transfer
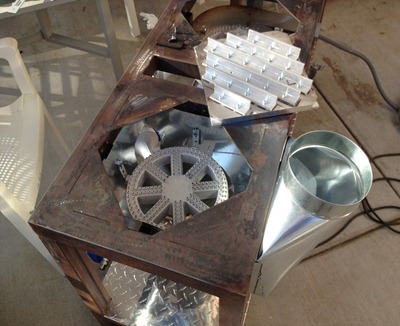
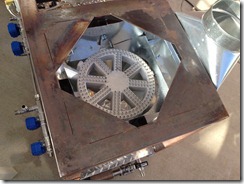
I consulted my friend/assistant brewer, Eric, who is a mechanical engineer by trade, and for test #3, a homemade heat sink was built out of a thick plate of aluminum and aluminum angle iron to capture more heat from the exhaust and transfer it to the kettles. This increased heat transfer, but after 50 minutes the water had only reached 187.3°F.
BrewPictures  007ventilation
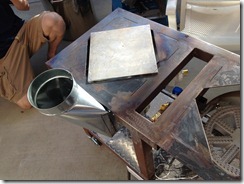
The next test involved creating a chimney (test #4). Just like with a house chimney, less dense hot air rises and is replaced by more dense, cooler air. This is referred to as the “stack effect”. The greater the thermal difference and the height of the chimney, the greater the stack effect.. We built a semi-enclosed chimney out of a 90 degree register box and sheet metal to force air to flow up from the bottom of the burner and out of the back. We tested it with and without a 6’ chimney (that’s not a typo, it was 6 feet tall), but both tests resulted in lower temperatures than with the aluminum heat sink.
gas pressure
I had the gas company come out and test/adjust the pressure to the house. I was at 7.3” WC at the main line to the house, and 6.7” WC at the line to my brew rig (acceptable range is 7-9” WC, according to the technician). He adjusted it up to 7.5” WC at the brew rig, which is the highest he was allowed to adjust it, but then volunteered to show me how to adjust the pressure myself “just in case I wanted to know how it works.”  I increased the pressure to approximately 8.6” WC, switched out the flex lines to the burner for larger diameter flex lines that were previously on order, and then ran two more tests.
BrewPictures  009Test #6 was with both the aluminum heat sink and the chimney at the new increased gas pressure. After 50 minutes, the temperature was 182.6°F, just shy of test #3, which took place before the gas pressure to the house was increased. This suggested that the chimney setup wasn’t helping.
In test #7, the chimney was removed and only the aluminum heat sink was used. At 50 minutes I was at 206.7°F, and at 55 minutes I was boiling.
Test #7 was by far the best results out of all of the tests, and is what I chose to stick with. A spreadsheet with the full test results can be found here. Below is a chart showing the performance over time for the tests mentioned above.
 
Google+