


There are many advantages in homebrewing that are simply not feasible in a commercial brewing environment. Homebrewers can take liberties in flavor and recipe experimentation where the worst thing that happens is that we end up with 5 gallons of beer that we have to dump because it makes taste testers vomit when they smell it (yeah, that's right, I'm talking to you, Berliner Weisse attempt #1). Now, let me be clear, I in no way mean to downplay the shitty experience of losing a batch of beer, but let's face it, the only thing being lost is a small amount of money, wasted time, and a healthy dose of pride. When a small craft brewery has to dump a batch of beer, it's thousands of dollars lost, unfulfilled orders, and empty tap handles to sell to thirsty, loyal customers.
On the flipside, and maybe not earth shattering news, the commercial brewing environment has many advantages that are cost and space prohibitive for homebrewers. Commercial breweries have more resources and specialized equipment designed to automate and control various aspects of the beer making process. One area on the cold side of the equation that commercial breweries devote a considerable amount of engineering efforts towards is keeping oxygen out of freshly crafted beer.
A small amount of oxidation is appropriate for some beer styles, but most beers benefit from reducing as much as possible the amount of dissolved oxygen that makes its way into beer after fermentation is complete. In pre-fermented wort, oxygen is the giver of life. In post-fermented beer, oxygen reduces shelf stability, causes off flavors reminiscent of wet cardboard and sherry, degrades hop aroma through degradation of terpenoid and sesquiterpenoid compounds reacting with oxygen in the headspace of the bottle, and can cause diacetyl development through oxidation of diacetyl precursors present in the beer.
Carboy to Keg CO2 Transfer Process:
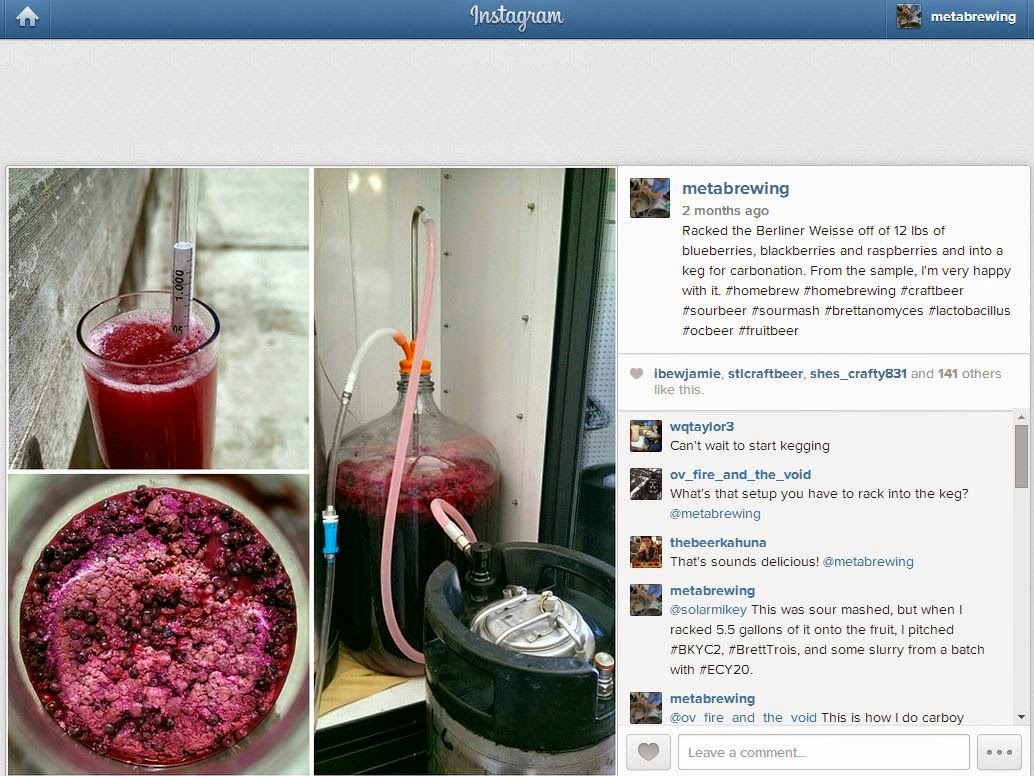
A few commenters on a recent Instagram post asked about my fermentor to keg transfer process. This blog post is me finally making good on my word to share how I transfer beer from fermentor to keg in a CO2 environment. A carboy with a racking cane is used in this setup, but the same technique can be used with just about any fermentation or conditioning vessel.
We are starting with a working assumption that all parts being used are cleaned and sanitized at the time of use, and that proper sanitation processes are followed along the way (e.g. corny quick disconnects are sprayed with sanitizer before connecting, etc.). I have settled on using ¼” ID thick-walled (½” OD) silicone tubing because I like being able to boil it for sanitation/sterilization, and it forms a quite secure connection with ⅜” fittings without the use of worm clamps (silicone is more compliant than vinyl, so in my experience a smaller diameter works better). If you use PVC tubing or will be using worm clamps, consider using ⅜” ID tubing. You may need to experiment to get the right size for your setup. I have some pictures included with alternative connections using PVC tubing and Luer Lock fittings. This process isn't set in stone and can be adapted/modified to work with any system.
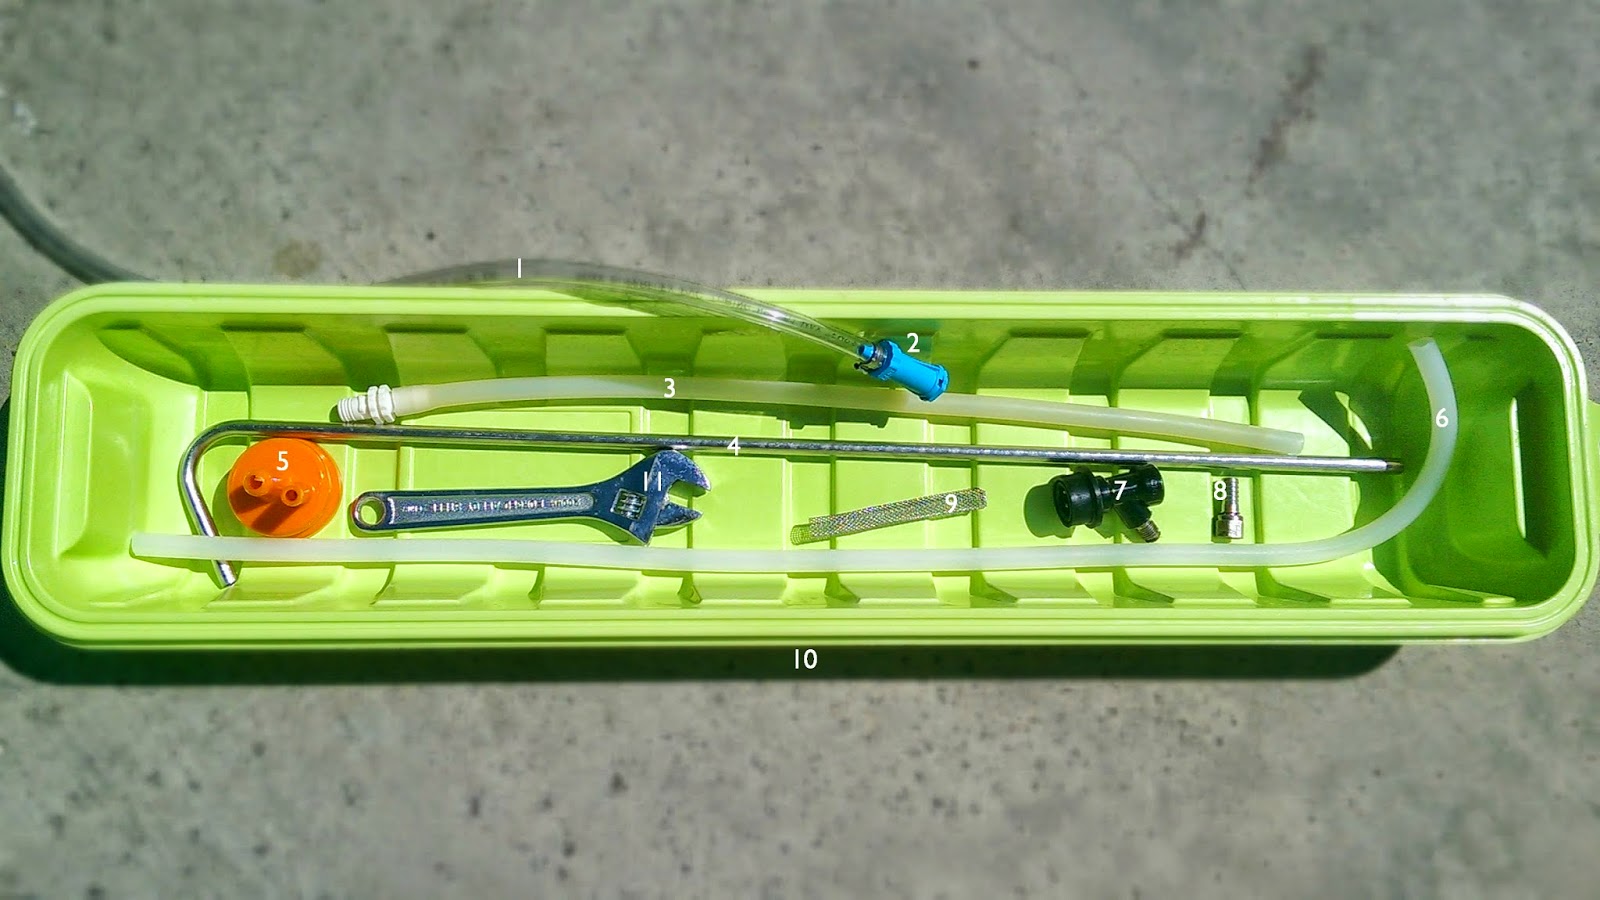 |
All items in the wallpaper tray awaiting sanitizer
|
Items needed:
- CO2 tank with low pressure regulator (not pictured). If your regulator is not hand adjustable, you will want a screw driver to adjust the flow. If you are kegging your beer, I’m assuming this is something you already have along with your keg.
- Kent Systems female shut-off quick disconnect attached to the CO2 line (stops flow of air when disconnected). I link to a ¼” barb fitting because my system has that size tubing for the utility line, but they can be found in various barb sizes.
- A few feet of ¼” ID (½” OD) silicone CO2 tubing for the CO2 line with a ⅜” barb male Kent Systems quick disconnect on one end. Use whatever diameter tubing you find gives you a secure connection around the carboy cap and works with your quick disconnect setup. You can use just a small piece of tubing if the main tubing coming off of your CO2 tank is long enough and doesn't weigh down or pull on the carboy cap.
- Carboy cap - two sizes are sold, so be sure to get the appropriate size for your carboy.
- Ball lock beverage out quick disconnect with ¼” male flare post (because we are using quite stretchy ¼” ID silicone tubing, it’s easier to use the disconnects with flare fittings which can be adapted to ⅜” barbs, which work well with this tubing).
- ⅜” barb to ¼” female flare swivel nut fitting (for corny quick disconnect).
- Racking cane filter - This keeps trub, hops and/or fruit from traveling up the racking cane and clogging your flow at the ball lock quick disconnect.
- Wallpaper tray - not required, but very helpful for filling with Star San and sanitizing everything together while assembled (and for general cleaning use around the home brewery).
- ¼” or adjustable wrench for pre assembling the corny quick disconnect and female flare swivel nut.

Steps:
- Pre sanitize kegs and fill with C02 (purge and fill 2-3 times to eliminate as much O2 as possible). Leave pressurized to test the seals.
- Crash cool for 48 hours or more, depending on flocculation characteristics of the yeast, then allow to warm up a couple of degrees before transfer to remove negative pressure inside the carboy (negative pressure will suck in ambient air when removing the airlock or blowoff tube).
- Assemble racking cane(4), carboy cap(5), and racking cane filter(9), and place inside the carboy with the bottom of the racking cane a little above any solids at the bottom of the carboy.
- Assemble the transfer tubing(6) and quick disconnect(7)(8).
- With the regulator pressure all the way off and the shut off valve open, attach the CO2 tubing(3) to the main CO2 tank via the Kent quick disconnects(2)(3) to allow the pressurized CO2 in the main line to depressurize while purging the transfer line at the same time. Then close the shut off valve.
- Attach the open end of the CO2 transfer line(3) to the small opening of the carboy cap(5). You will want to push the tubing at least ⅝” (or more if you can do it) onto the cap to ensure a good connection to prevent it from popping off while transferring under pressure.
- Purge most of the CO2 out of the keg with the pressure relief valve, then connect the beer transfer tubing assembly to the liquid out of the keg to ensure there is no sanitizer left inside the keg, to purge the transfer line with CO2, and to make sure that no CO2 from the keg is pushed into the racking cane(4) (which could disturb the sediment in the carboy).
- If your pressure relief valve can be left open by lifting and turning a half turn, leave it open now.
- Attach the open end of the beer transfer tubing(6) to the racking cane(4). Make sure it is ¾” up the racking cane arm to ensure a secure fit. With my setup, no worm clamp is needed, but using one is good insurance and recommended if the tubing isn’t a very secure fit (if the line pops off you’re going to have a huge mess on your hands).
- Open the shut-off valve on the CO2 regulator and then slowly turn the regulator pressure up until you hear it begin to transfer CO2. You should see beer begin to flow from the dip tube through the transfer line and into the keg at this point. If you have the type of pressure relief valve that does not stay open with a ¼ turn, you’ll need to lift it every 10-20 seconds to ensure beer keeps transferring (I got tired of that and have since replaced all of my pressure relief valves with this type that will stay open.
- Assuming you cold crashed, you can just watch the rising condensation on the keg to see where the beer level is at, and disconnect the keg quick disconnect when it gets to the correct level (closing the pressure relief valve a few seconds before disconnecting the quick disconnect).
- I've found that carboy caps are not always the most secure fit, especially on the 6 gallon carboys. There have been a few times that the cap has popped off during transfer (particularly if I am rushed and transferring with a little higher pressure). While this is usually more alarming than it is a problem, it can disrupt the flow of beer and disturb sediment at the bottom of the carboy. To prevent this, keep your hand around the cap to hold it down on the mouth of the carboy. You’ll hear some CO2 leaking around the cap, so just hold it in such a way that less CO2 escapes.
- Shut off the CO2 flow and depressurize the carboy by disconnecting the Kent quick disconnects.
- Reconnect your corny gas quick disconnect to your CO2 tank (it’s easy to swap out if you have another Kent quick disconnect), turn up the pressure a bit (8-10 PSI, but never more than the pressure the keg will be hooked up to for carbonation, unless you want beer up your gas line or have ball lock quick disconnects with check valves), and then purge the filled keg a few times with CO2 (fill with CO2, pull the pressure relief valve, repeat).
- Connect the keg immediately to the CO2 line you will be carbonating it with, if possible. Cornelius kegs lids sometimes leak air without positive CO2 pressure to hold them in place, which in turn would allow ambient air to creep in.
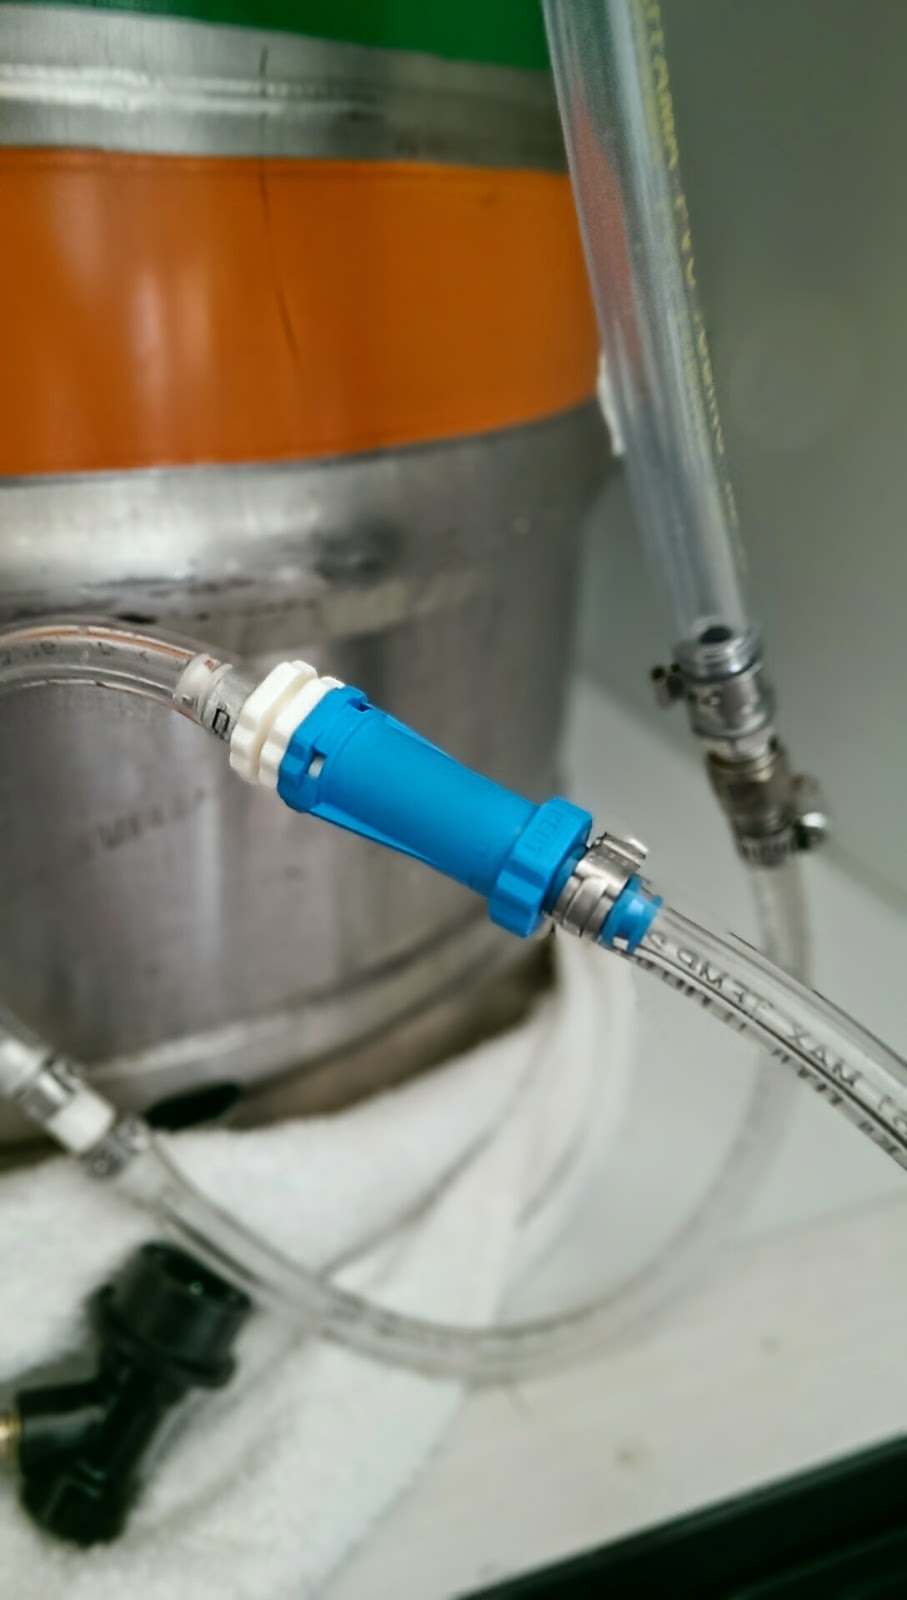
Note that in some images you will see additional Luer Lock connections (which I use to quickly switch out various connection types).
Have some questions, criticisms, thoughts or suggestions? Feel free to post them in the comments.