Monday, February 4, 2013

Split batch: Redemption and Sanctification Clone Recipes

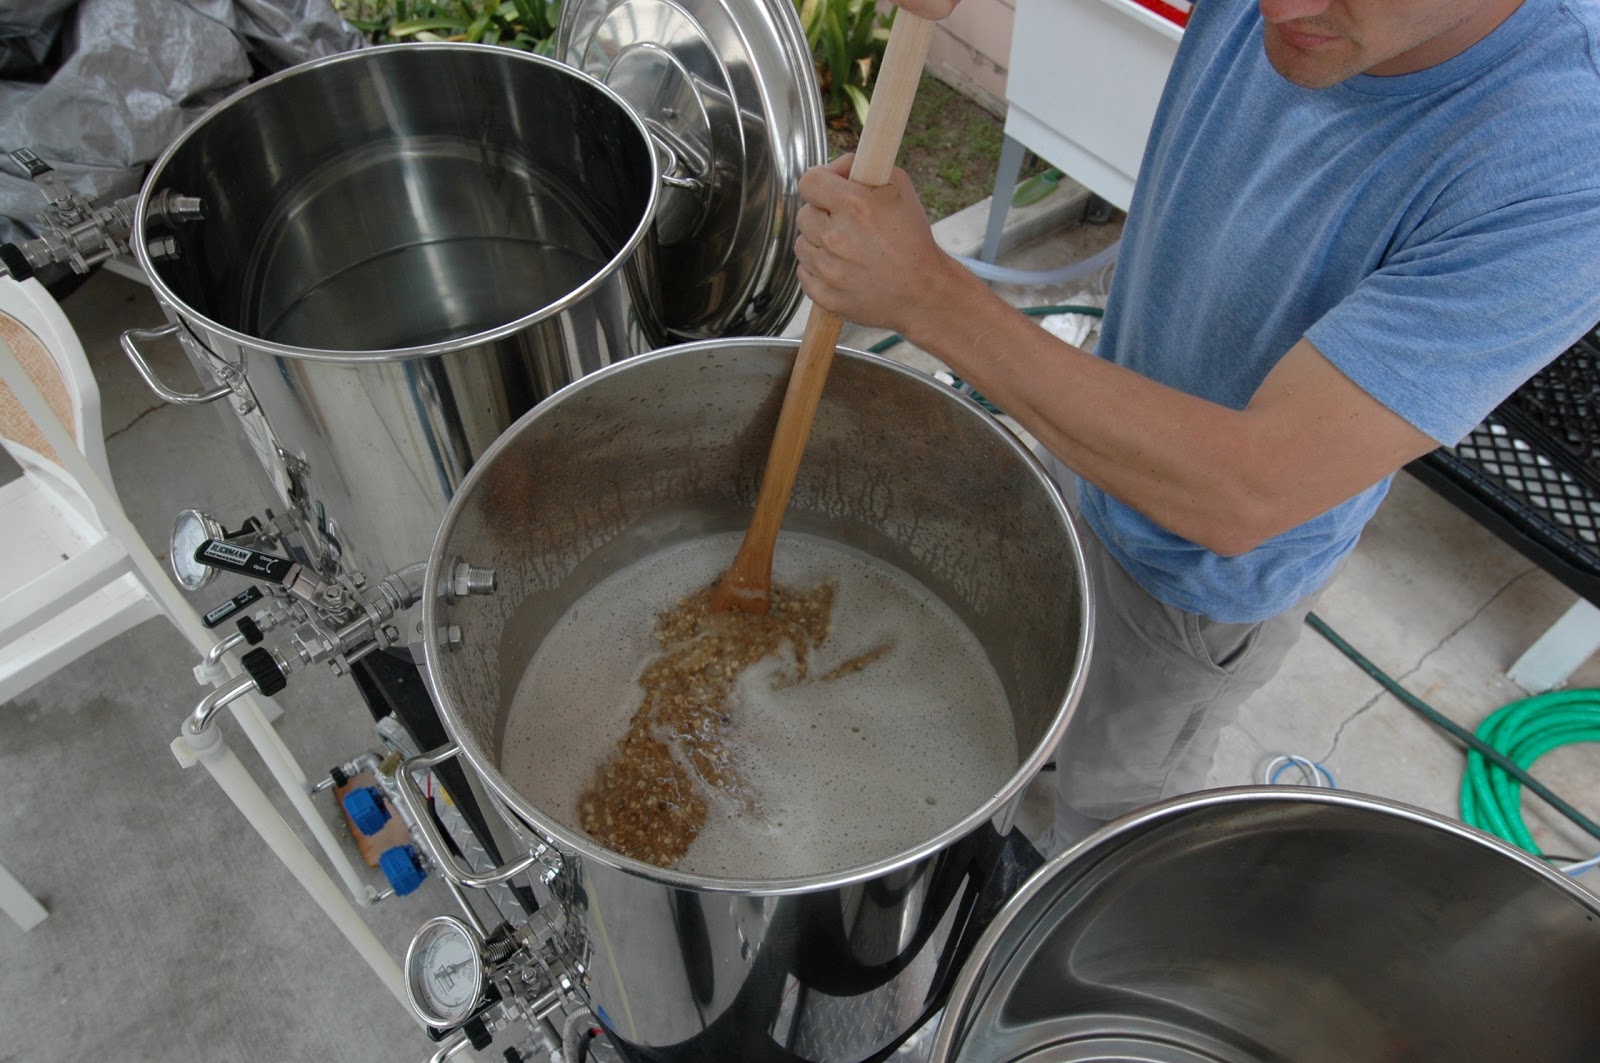
1-BrewPictures  056For me, homebrewing = experimentation. I have yet to ever brew the same beer twice. While I’ve repeated certain aspects of some recipes, I always tweak something the next time I brew it. It helps me learn.

Another way that I learn is by comparing and contrasting. I’ve been to many beer tastings, but the ones that have taught me the most are the ones in which I can do side-by-side tasting  rather than one after the other. I can smell one, then smell the other; taste one, then taste the other. The sensory experiences are so close to one another that it helps my brain distinguish between minute differences that I otherwise wouldn’t pick up on.

This was an inspiration for why I chose to build a system that brews 12 gallon batches. It allows me to spend the same amount of time brewing one base beer, and then do different things on the cold side of the equation. I can compare yeasts, fermentation temperatures, hops, dry-hopping schedules, and so on. The learning experience has been so much more than it would have been doing single batches, and it barely costs me any more time or money to pull it off.

Two beers that I’ve always enjoyed from Russian River Brewing Company are Redemption and Sanctification. Redemption is a Belgian Single, also referred to as “Enkel.” Traditionally, Trappist breweries would make this lighter version of their regular beers for consumption by the monks at the monastery. Redemption is similar to a Belgian Blonde, but is lower in gravity.

Sanctification is a non-barrel aged sour golden that is advertised as being primary fermented with 100% Brettanomyces, although Vinnie has stated that they also add Lactobacillus and Pediococcus from a house mixed culture.

After doing a little digging around, I found that these two beers were extremely similar in the malt profile, with the distinguishing differences being that Redemption is lighter on the non-2 row malts (3% each, compared to 5% each), and Sanctification is 4-6 (depending on the source) points higher in original gravity than Redemption. The Russian River Brewing Company website shows the original gravities at 1.048 and 1.052. In emails and interviews, Vinnie has quoted them at 1.052 and 1.058.

For my split batch, I went with the Sanctification malt bill and chose the higher of the two target gravities because I was most interested in getting the Sanctification beer down. A Belgian single can be whipped up anytime, but a sour beer requires a little hell of a lot more time before it is ready for consumption. A  portion of the hop schedule was moved to a 0 minute addition, which lowered the projected IBUs somewhat.
WLP545 Belgian Strong Ale yeast was used for Redemption because my local homebrew shop was out WLP530 Abbey Ale Yeast and there wasn’t time to order online. For Sanctification, ECY20 Bug County was used rather that the complex culture mix that Vinnie gave in his recipe.

1-24 hours 03 (sanct left_redemp right)Brew date: 03/24/2012
Batch size: 11.5 US Gal
Estimated/Actual OG: 1.058/1.056
Estimated IBU: 20.0
Estimated SRM: 4.2
Estimated ABV: 6.0% (Redemption)/7.0% (Sanctification)
Estimated total efficiency: 72%

Water
:
Started with R.O., then additions to match Beersmith’s “Antwerp” profile.

Grain:

85.0% (21.60 lb) – American 2-row (Great Western) – 2.0 SRM
5% (1.27 lb) – Vienna malt – 3.5 SRM
5% (1.27 lb) – Acid malt – 3.0 SRM
5% (1.27 lb) – White wheat malt (Great Western) 2.4 SRM

Hops:

80 min – 1.48 oz Styrian Goldings (5.40% AA)
15 min – 1.48 oz Styrian Goldings (5.40% AA)
0 min – 0.5 oz Styrian Goldings (5.40% AA)

Other/Adjuncts:

15 min – 1 tsp Wyeast yeast nutrient
15 min – 0.5 tsp Supermoss
10 drops Fermcap

Mash:

50 minutes @152°F
10 minutes @168°F

Boil:

90 minutes

Yeast:

WLP545 Belgian Strong Ale (Redemption)
ECY20 Bug County (Sanctification)

1-2012-04-29 15.36.38Results/Notes:

Due to what must have been poor programming on my part, the fly sparge process turned on 38 minutes into the mash while I wasn’t paying attention (a pitfall of automation). The manual ball valve to the boil kettle was closed. The mash tun read 16 gallons (probably 5 gallons above the grain bed) before it was noticed and stopped. The mash temp was brought back up to 152°F for about 10 minutes before ramp out.

The sparge went fast (15 minutes), which likely added to the poor mash efficiency.
Pre-boil gravity was 1.043. Target was 1.047. The boil was slowly rolling due to some burner issues I had been having. At 90 minutes, the gravity was at 1.046. The boil was extended by 40 minutes. Gravity read 1.056 at knockout.

The batch was split into two carboys. A 1.5L starter of WLP545 Belgian Strong Ale was pitched into one carboy, and ECY20 Bug County was pitched into the other. Fermentation was at 68°F.
The Belgian Single was given a 1-week primary and 2 week secondary before racking half to a keg and bottling the other half. The Sanctification was given a 2 week primary and then racked to secondary for what might be forever, or a year, whichever comes first.

Wednesday, January 16, 2013

The freshest sources for hops

1-BrewPictures  083What I find interesting is that I rarely see the farm, brand or supplier of hops mentioned when discussing sources for hops. Typically, varietals are mentioned as a commodity. Someone will post, "[company name] has this year’s Cascade for $11/lb," as if Cascade from one source is the same as any other source, with the only difference being price. I never used to give this much thought, until this last year...

Last year I purchased Citra hops from two different suppliers (both the current harvest year), and there was a huge difference between the aroma of the hops. It wasn't even close. You could take one whiff from the first bag, and then a whiff of the other, and it was night and day. One had a big citrus/tropical aroma; the other, not so much when compared to the first. Had I not had the two there to compare, I might have thought the one with less aroma was fine. After all, it still smelled like hops. It's just that it was so much more muted than the other source that I dumped out the hops that had less aroma. Why use inferior hops in something that you’re going to spend a considerable amount of time, energy and money into making?

Shopping for hops is like shopping for produce. You can shop based on price per pound, or you can shop based on quality (however you define quality is up to you). Farmers that properly grow good crops in rich soil, wait to pick them until they’re ripe, and then deliver the fresh produce to local shops for immediate purchase, simply cannot compete on price with the mega farming corporations out there that are cutting costs at every step of the process. For example, I can buy oranges at the local grocery store that are decent (taste like what my mom bought, likely at the same kind of grocery store), or I can get oranges from a local farmers market or CSA that are the juiciest, most flavorful oranges I've ever had. It's like [excuse the pun] apples and oranges. This same analogy applies to hops.

HopUnion 1 oz and 1 lb bags
Of course, you can overpay for crappy, poorly treated hops as well (my LHBS, for one). Price isn't what makes one hop supplier better than another. I'm not familiar with every hop supplier out there, but I've ordered from several online sources and found HopUnion’s nitrogen flushed hops to be quite fresh and fragrant. I typically buy 1 lb bags from LabelPeelers because of the cost savings. This year my pound of Amarillo from LabelPeelers came in (16) 1 oz packages. I like the idea of the 1 oz HopUnion bags for the sake of freshness. Keeping the hops in a sealed, nitrogen flushed environment is better than opening the same bag several times throughout the year (even if you reseal it with a vacuum sealer).

Hops Direct 1 lb bag (partial)
HopsDirect seems to have fresh hops, too, but I find their 1 lb vacuum sealed foil bags a little difficult to work with. They often come hard as bricks, with the pellets being stuck together. Farmhouse Brewing Supply offers a wide variety of hops in convenient 4 oz packages, and the prices are good. I’m not a big fan of the packaging, but most of the packages remain sealed. I haven’t compared the hops that I’ve bought from Farmhouse Brewing Supply with other suppliers/retailers.

Farmhouse Brewing Supply 4 oz bags
I'd like to try hops from IndieHops. I like what they stand for and I hear good things about them, but the minimum order of 11 lbs per hop is prohibitive for a homebrewer, and they only supply a limited number of hop varietals. IndieHops seems to cater more to small craft brewers than to homebrewers, and sell first to contracted accounts. This might be a good company to do a group buy with.

Other than the big online homebrew shops, some other hop suppliers that I’ve seen people ordering from are Yakima Valley Hops (they package their own hops at reasonable prices), Nikobrew (not the best pricing, but cheap shipping), and some discount eBay sellers. I have no experience buying from these companies.

I'd be interested in hearing others' thoughts on this subject in the comments. Has anyone else found a difference between hop suppliers? Are there other good sources for quality hops at reasonable prices?

Tuesday, January 1, 2013

Low pressure burner testing

BrewPictures  008
The first question I had when designing my brewing system was what type of energy to use. My first choice was steam, but that was a pipe dream (pun intended). Next was electric for a variety of reasons, but that option required me to upgrade my electric panel, which was cost prohibitive. That left me with either propane or natural gas as options. I decided on natural gas because it is more economical, the idea of refilling tanks regularly was not appealing, and I could easily see myself running out of gas in the middle of a brew session.
An initial test run on the system produced poor results. After nearly 2 hours of heating, it hadn’t reached a boil. Some testing was needed to increase the performance of the burners (a link to the spreadsheet data is at the bottom of the page).
The areas to be tested were:
  1. burner height – the distance from the burner to the kettle
  2. heat transfer – using a more conductive metal to transfer thermal energy from the flame to the kettle
  3. ventilation – insufficient ventilation chokes the flame
  4. gas pressure – the burners were designed to work optimally at 11” WC of pressure, while most utility companies deliver gas to residential buildings at 7-9” WC.
For all tests, 10 gallons of 75°F water was heated on a single 10” low pressure burner, and temperature readings were taken every 5 minutes.
1-DSC_0005burner height
The first tests (test #1 in the chart below) involved adjusting the burner mount height. The heat shield/burner mount has a split open back to allow for rear ventilation above the burner, and comes with 3 sets of holes for adjusting the distance between the burner and the bottom of the kettle. The distance from the bottom hole to the top hole is approximately 1”, and while there was a slight difference in performance between the top mounting hole and the bottom, the results were not significant (which is why only one of the tests is charted). After 50 minutes, the best configuration was at 170.7°F.
heat transfer
I consulted my friend/assistant brewer, Eric, who is a mechanical engineer by trade, and for test #3, a homemade heat sink was built out of a thick plate of aluminum and aluminum angle iron to capture more heat from the exhaust and transfer it to the kettles. This increased heat transfer, but after 50 minutes the water had only reached 187.3°F.
BrewPictures  007ventilation
The next test involved creating a chimney (test #4). Just like with a house chimney, less dense hot air rises and is replaced by more dense, cooler air. This is referred to as the “stack effect”. The greater the thermal difference and the height of the chimney, the greater the stack effect.. We built a semi-enclosed chimney out of a 90 degree register box and sheet metal to force air to flow up from the bottom of the burner and out of the back. We tested it with and without a 6’ chimney (that’s not a typo, it was 6 feet tall), but both tests resulted in lower temperatures than with the aluminum heat sink.
gas pressure
I had the gas company come out and test/adjust the pressure to the house. I was at 7.3” WC at the main line to the house, and 6.7” WC at the line to my brew rig (acceptable range is 7-9” WC, according to the technician). He adjusted it up to 7.5” WC at the brew rig, which is the highest he was allowed to adjust it, but then volunteered to show me how to adjust the pressure myself “just in case I wanted to know how it works.”  I increased the pressure to approximately 8.6” WC, switched out the flex lines to the burner for larger diameter flex lines that were previously on order, and then ran two more tests.
BrewPictures  009Test #6 was with both the aluminum heat sink and the chimney at the new increased gas pressure. After 50 minutes, the temperature was 182.6°F, just shy of test #3, which took place before the gas pressure to the house was increased. This suggested that the chimney setup wasn’t helping.
In test #7, the chimney was removed and only the aluminum heat sink was used. At 50 minutes I was at 206.7°F, and at 55 minutes I was boiling.
Test #7 was by far the best results out of all of the tests, and is what I chose to stick with. A spreadsheet with the full test results can be found here. Below is a chart showing the performance over time for the tests mentioned above.

Saturday, December 22, 2012

Color-blind: An American Black Ale


Color-blind: An American Black Ale

American-Style Black Ale. That’s the name the Brewers Association has settled on in their 2012 Beer Style Guidelines for the artist beer formerly known as Black IPA, Cascadian Dark Ale (CDA) and India Black Ale (IBA) (as well as some lesser known variants such as American Dark Ale and Avery’s New World Porter).

First off, we can all drop the suffix “style” from the name, given its unhelpful redundancy (it is a style by way of its inclusion in a style guideline). That leaves us with American Black Ale (ABA).

When I first heard the new name, I was a little unsure about it. It’s generic and boring, unlike the paradoxical beverage that it refers to. It’s also descriptive and absent of any regional ties within the U.S. This is a subject that I won’t get into because it has already been argued by Matt Van Wyk in favor of CDA, and then rebutted by Greg Koch in favor of Black IPA.

ABAs seem to parallel their IPA cousins in how they are expressed regionally (
I’d like to state my bias: most of the American Black Ales I have tried have been on the left half of the country, and to this date none that I have tried have called themselves American Black Ales).


In the Pacific Northwest, they hold firmly to the moniker Cascadian Dark Ale (a name reserved almost exclusively for this region), and generally have a more “balanced” Northwest approach to the malt/hop bill. Even if the beer is hopped to high heaven, in most cases there will be a distinguishing malt character supporting the beer. Pacific Northwesterners are not afraid to let a little bit of roast and dark crystal malts party in your mouth with the citrus and pine flavors of regionally appropriate “C” hops.

Just like how West Coast IPAs tend to be dry on the palate, lighter in malt character, ludicrously dry-hopped, and then dry-hopped again, Black IPAs from California not-so-shockingly embody the same characteristic as their IPA cousins. They just wear a black suit to the party. “Balanced” isn’t often used to describe a good example of a Black IPA from the West Coast.

It’s likely that the American Black Ale style will be included in the next revision of the Beer Judge Certification Program (BJCP) style guideline (used by the American Homebrewers Association), which is due for a revision if they keep with their self-proclaimed 3-5 year revision cycle (last revision was 2008). The 2012 Brewers Association style guideline (used at GABF), gives us the following description:
American-style Black Ales are very dark to black and perceived to have medium high to high hop bitterness, flavor and aroma with medium-high alcohol content, balanced with a medium body. Fruity, floral and herbal character from hops of all origins may contribute character. The style is further characterized by a balanced and moderate degree of caramel malt and dark roasted malt flavor and aroma. High astringency and high degree of burnt roast malt character should be absent.
The marriage of roasted malt flavors with the tropical/citrus/stonefruit hop flavors that I seek in an IPA, produce an ugly kid with an annoying personality. The flavors are not complimentary and detract from each other. For a dark, hop-forward beer to keep my attention, the roast, chocolate and even the darker crystal malt characteristics need to be subdued.

In my first stab at this style of beer, I took an IPA recipe that I’m familiar with and then added Midnight Wheat by Briess, a 550°L bitterless black malt that has the lowest “roast” character of any black malt that I could find. It was specifically created to limit the bitter, astringent and roasted characteristics found in dark roasted malts. The goal was to create a beer that would fool a blindfolded taste tester into thinking the beer was an IPA.

Color-blind: An American Black Ale
Batch size: 12 gal
Estimated OG: 1.067
Estimated IBU: 59
Estimated SRM: 31.7
Estimated ABV: 5.7%
Estimated total efficiency: 75%

Grain:
84.0% (24.76 lb) - Rahr 2-Row - 1.8°L
6.0% (1.77 lb) - Midnight Wheat - 550°L
4.0% (1.18 lb) Carapils - 2.0°L
3.0% (0.88 lb) Crystal 60 - 60°L
3.0% (0.88 lb) White Wheat Malt - 2.4°L

Hops: (all pellet)
60 min - 1 oz Millenium (15.9% AA)
10 min - 1 oz Zythos (10.9% AA)
10 min - 2 oz 7Cs (9.9% AA)
10 min - 1 oz Falconer’s Flight (11.4% AA)
10 min - 1 oz Amarillo (10.3% AA)
10 min - 1 oz Galaxy (14.0% AA)
0 min - 2 oz Zythos (10.9% AA)
0 min - 4 oz 7Cs (9.9% AA)
0 min - 2 oz Falconer’s Flight (11.4% AA)
0 min - 2 oz Amarillo (10.3% AA)
0 min - 1 oz Galaxy (14.0% AA)
+25 min - 1 oz Zythos (10.9% AA)
+25 min - 2 oz 7Cs (9.9% AA)
+25 min - 1 oz Falconer’s Flight (11.4% AA)
+25 min - 1 oz Amarillo (10.3% AA)
+25 min - 1 oz Galaxy (14.0% AA)
dry hop - 2 oz Zythos (10.9% AA)
dry hop - 4 oz 7Cs (9.9% AA)
dry hop - 2 oz Falconer’s Flight (11.4% AA)
dry hop - 2 oz Amarillo (10.3% AA)
dry hop - 2 oz Galaxy (14.0% AA)
dry hop - 2 oz Cascade (6.4% AA)

Yeast:
WLP007 Dry English Ale Yeast (decanted 1.7 L starter +1 vial)

Mash:
50 minutes @ 152°F (Midnight Wheat added 20 minutes into the mash)
Mash out @ 168°F and fly sparge for 35 minutes.

Boil:
90 minute boil.
0 minute hop additions added at flameout.
+25 minute hop additions added after 0 minute additions had been whirlpooling for 25 minutes, then stirred in hop spider for 5 minutes with a sanitized stainless steel spoon before recirculate through chiller to drop temp.
15 minute rest to allow for settling of trub, then transferred to conical fermenter at 70°F. Conical was put in fermentor fridge and dropped temp to 64°F before pitching 2 liter yeast starter. Held at 65°F for 2 days before allowing to naturally rise to 67°F until completely fermented.

Results/Notes: (tasting notes)

  • This was the first time since getting my mill that my pre-boil and original gravity readings were exactly on the numbers. I added the Midnight Wheat about 20 minutes into the mash to further reduce any potential astringency that might come from the malt.
  • The hop bill on this recipe was big (38 oz). I’ve realized that for beers with massive hop additions, my hop spider isn’t an ideal solution for getting good extraction of the hop oils into the wort, while keeping the hops out of the plate chiller. I need to work on new solutions for future batches that allow me to recirculate back into the boil kettle while chilling (my ground water isn’t cold enough to go straight out, even in the winter).
  • I seem to have found my limit for my continuously recirculating dry hop setup. 12 oz of hops in my conical chokes the pump. It also leaves such a large hop pile at the bottom of the conical that I can’t properly dump enough of them out of the ¾” ball valve before it clogs.
  • I need a rotating racking cane for my conical that can be turned up and out of the hop pile. A lot of dumps were required before I could get hopless beer to transfer into kegs.
  • I designed the recipe as a 12 gallon batch expecting I would end up with 10 gallons of beer. After hop losses in the kettle and several yeast and hop dumps, I netted 8.5 gallons of beer in kegs.

Tasting notes can be found at this post.

Thursday, December 6, 2012

I post therefore I brew

...or, to be more accurate with my logic (with no disrespect to René Descartes), "I post therefore posting exists," or "I brew therefore brewing exists." Both have already been proven.

So why create this blog?

I've learned a lot in my short time of brewing beer at home, and I owe a great deal of credit to blogs created by homebrewers around the world. It's time to do my part.

This will be a place to document my experiments with recipes, equipment, processes and whatever else happens to sneak its way in here.
 
Google+